
In today’s era of transformation businesses, developers and enthusiasts are increasingly turning to AI solutions to enhance their online presence and engage with customers. One notable advancement in this realm is the ability to create chatbots, AI powered virtual assistants that can handle inquiries, interact with users and streamline processes.
Among the available platforms CustomGPT stands out by offering a user friendly and robust approach to building personalized AI chatbots. This article will guide you through all aspects of CustomGPT covering a review of its features and pricing, as well as a step by step tutorial on creating your own chatbot.
Whether you’re a business owner aiming to enhance customer support or a developer exploring AI technology this article will equip you with the knowledge and resources to leverage CustomGPT effectively.
What is CustomGPT?
CustomGPT is a framework that allows anyone to easily build and train their own GPT (generative pretrained transformer) models. Unlike generic chatbots, which often rely on pre-set scripts or limited datasets, CustomGPT allows users to input their own knowledge base, customize the AI’s persona, and integrate it seamlessly with their website or app.
Core Features of CustomGPT:
- Custom Knowledge Base: Users can train their chatbot using content they upload or existing data.
- Persona Customization: Make the chatbot’s tone, language style, and persona match your company’s voice.
- Seamless Integration: Simply incorporate the chatbot into your website, app, or whatever.
- User-Friendly Interface: It is an intuitive platform even for someone not very technical.
- Advanced Customizations: For the power user, CustomGPT provides API access, multi-language support and much more.
CustomGPT is great for a business trying to offer personal customer support or an educator that wants an interactive teaching assistant, or even a content creator who wants to automate some of their work.
Why Choose CustomGPT?
Ease of use, customization options, integration capabilities, and cost. CustomGPT does all of these things really well, and it is an excellent choice for anyone who would like to develop a first rate chatbot.
Comparison with Other Platforms: Sure, OpenAI’s ChatGPT and others have some pretty advanced AI models, but they’re not as easily customizable and typically require a bit more of a technical background. CustomGPT, on the other hand, is designed to be accessible to users with varying levels of technical skill. It also provides more ways to customize the chatbot’s behavior and outward appearance.
Use Cases:
- Customer Support: Answer the frequently asked customer questions automatically so your support team can concentrate on the more difficult problems.
- Content Creation: And write articles, or even entire.
- Educational Tools: Create some kind of interactive learning modules or virtual tutors to increase student participation.
CustomGPT Pricing
Cost is one of the main factors in choosing a platform. CustomGPT has many plans to suit all needs and wallets. Each level offers different amounts of features and customization.
Pricing Tiers:
- Basic Plan: Perfect for the small business, or the individual just starting out. This plan allows for the use of the standard features of CustomGPT, such as simple customization and api implementation.
- Pro Plan: But most appropriate for expanding companies that require the more sophisticated API access, multi-language support, etc.
- Enterprise Plan: This plan is actually made for the big corporations with the complicated needs and full access to everything including the advanced analytics and the premium support.
To view current prices and to find the plan that is best for you, go to CustomGPT Pricing.
Value Proposition: Every level of pricing is created to make it the best deal for that audience. The Basic Plan is good for the beginner AI chatbot user who just wants to test the waters without paying a lot of money. For those who require more from there chatbot, there is the Pro Plan, and for those who need everything, all at once, there is the Enterprise Plan.
How to Build Your CustomGPT Chatbot – A Step-by-Step Guide
It is fairly easy to construct a CustomGPT chatbot because it has a very accessible interface. Here’s a step-by-step guide to help you get started::
Step 1: Sign Up on CustomGPT.ai
The first step is to create an account on CustomGPT.ai. Just go to the Custom GPT Website, click sign up, and fill out all the necessary details. After creating your account you will be taken to the dashboard from which you can begin constructing your chatbot.
Step 2: Select Your Knowledge Base
Now you’ll have to choose your chatbot’s knowledge base. This is where you’ll input the information that the chatbot will use to generate responses. You know, your own data or one of their data sets.
Step 3: Define the Persona
One of the unique features of CustomGPT is the ability to customize the chatbot’s persona. And then you get to toy with how the chatbot responds, and the language it uses, and how it talks, and how it acts. You can make the chatbot as uptight and anal as you want, or cool and cool, or nice and friendly, or even sarcastic and funny.
Step 4: Customize the Chatbot’s Behavior
There are a lot of options for CustomGPT to make your chatbot different. Which could be anything from building conversation flows/triggers to interfacing with third party applications (CRM, analytic tools etc.
Step 5: Embed the Chatbot on Your Website
After you’ve customized the chatbot to your preferences, the next step is to simply place it onto your website or app. CustomGPT is just a few lines of code that you just copy and paste into your web pages html. That should be a pretty easy process and shouldn’t require any hardcore coding.
Step 6: Testing and Optimization
Before launching your chatbot, important to test it to ensure it performs as expected. Oh yeah, and this other site is customgpt, and you get to “test drive” conversations so you type in a bunch of questions and it shows you how the chatbot answers these questions. So you can play with it, and then fine tune it to work at its optimum level.
Pros and Cons: Pros:
- User-friendly interface
- Extensive customization options
- Flexible pricing plans
- Seamless integration with other tools
Cons:
- Some advanced features may require technical knowledge
- Limited options in the Basic Plan
Comparison with Competitors: When compared to Tidio or Landbot, Custom GPT is so much easier to use and customize. True, there are other sites that come with more pre-made templates, but CustomGPT has the most freedom for those who wish to create something really original.
Advanced Features and Integrations
But for those users who require a little more than the bare minimum, CustomGPT provides a variety of advanced features and integrations.
Integrations: It can be connected to all sorts of other 3rd party applications, such as CRM, analytic, social media, etc. This way you can expand your chatbot’s capabilities and make sure it integrates perfectly into the way you do things.
Advanced Customizations: For the more technically inclined, CustomGPT provides API access, so you can build some badass chatbot functionality. It also has multi-language models, so this would be great for a company that deals in multiple countries.
Tips for Maximizing CustomGPT’s Potential
Some tips on how to use CustomGPT to its full potential include:.
Best Practices:
- Start Simple: Begin with a basic chatbot and gradually add more features as you become more comfortable with the platform.
- Test Regularly: You can catch and correct any problems before they start to effect the users experience through frequent testing.
- Use Analytics: Use CustomGPT’s analytics to monitor progress and see what needs improvement.
Common Mistakes to Avoid:
- Overloading the Chatbot: Don’t try to get your chatbot to do too much at once though. Do a few things, but do them really well.
- Neglecting the User Experience: Always consider how the user will interact with your chatbot and make adjustments as needed to improve the experience.
How to use CustomGPT
1. Open up CustomGPT
To start using CustomGPT, sign up and get your free trial.

Then create a team dashboard. This is where all your AI support agents live.
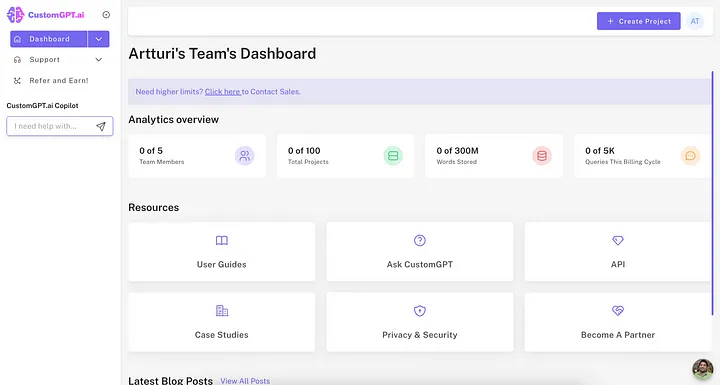
2. Create a Custom GPT Bot
Then click on “Create Project.”

This starts creating the first CustomGPT bot for you.
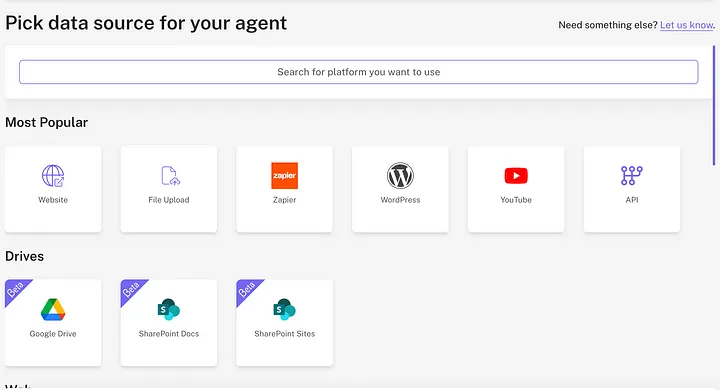
3. Choose a data source
Next, it’s time to choose where your AI agent should get its data. The AI agent will only use this data when giving answers.
You can pick your data source to be your website, text files, documents, Zapier, WordPress site, YouTube channels, and more.
You can use any file or document format to train your AI. Then your CustomGPT bot reads it, memorizes it, and then uses that data to find answers in an instant.
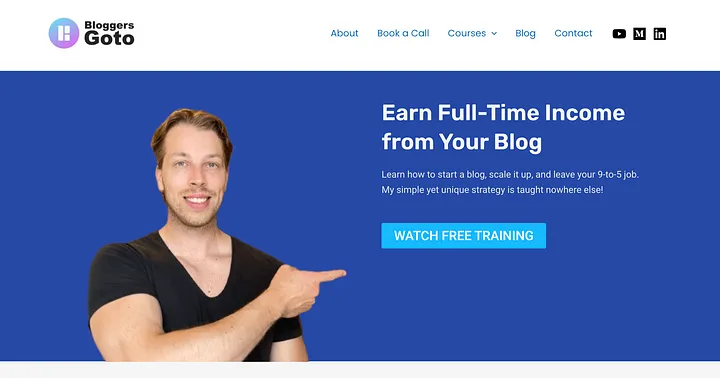
I want to help my readers get answers to their questions related to blogging based on what I’ve shared on my site in my 130+ blog posts (and over 200,000 words of text).
That’s handy because I don’t have to answer questions that are already answered on my website, which is basically what 90% of customer support is.
To train your AI with website data, all you need to do is enter your URL as the data source:
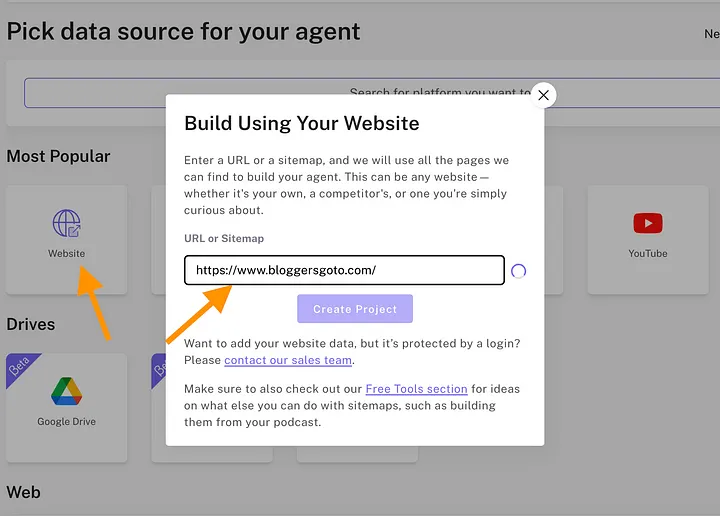
Then wait a second for the AI to find your sitemap.
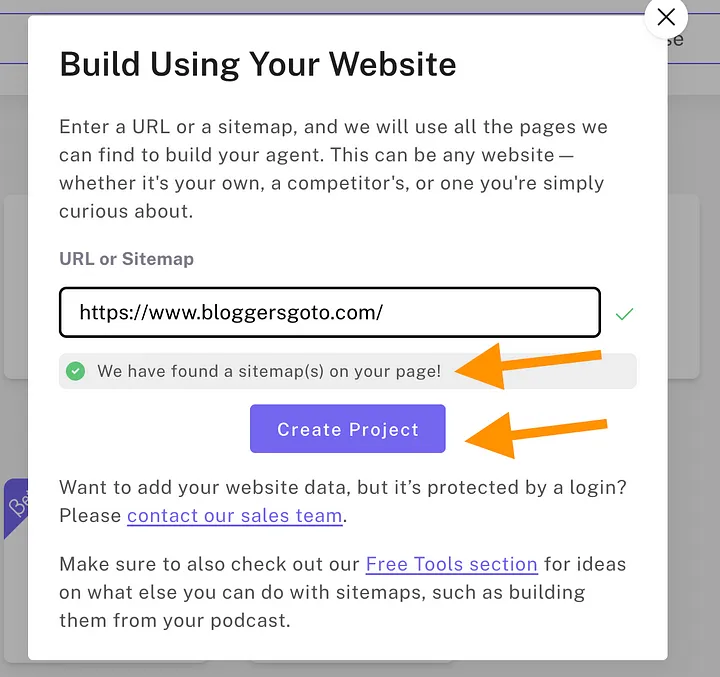
Once the search completes and your sitemap is found, click on Create Project. Now the initial version of your chatbot is ready! Then it’s time to customize it to match your brand and needs.
4. Customize
Next, click on Take Me To My Agent to start customizing your AI.
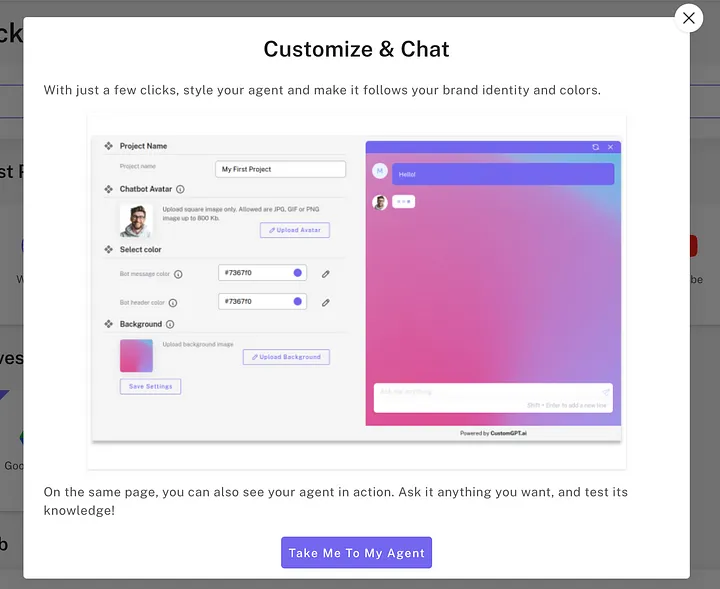
This opens a view where you can customize your AI agent’s appearance.
For instance, you can click “Change Avatar” to upload a photo of yourself or a team member.
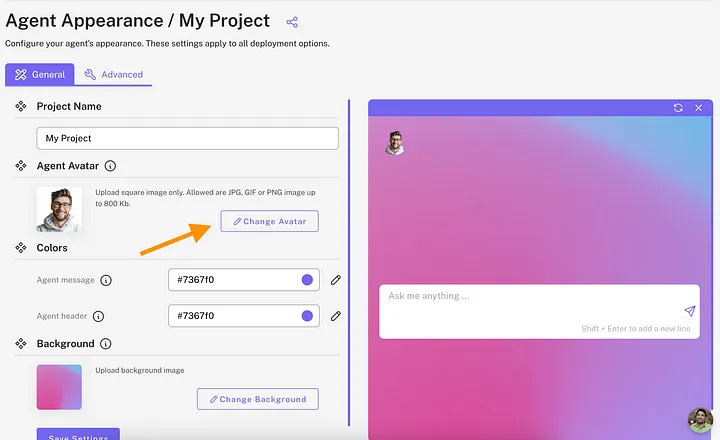
Also, feel free to change the colors and background to match your brand’s design.
Don’t forget to hit “Save Settings” because there’s no auto-save!
5. Create a persona
Remember to also customize your AI agent’s persona by clicking the “Agent Persona” tab on the left. This makes your chatbot sound like you and respect your company values.

Then describe the persona similar to how you would describe the job for a real employee.
I told my AI agent this:
You’re a custom blogging agent that helps bloggers achieve their goals based on information Artturi Jalli has shared on his blog called bloggersgoto.com. Be helpful. Escalate complex issues. Stay on topic and don’t be generic at all, only write answers that solve problems and leave all filler jargon out. Understand your audience and be concise. Know your limitations and don’t try to come up with an answer if you can’t find it in the dataset.
6. Interact and iterate
Then I recommend putting in the time to interact with your AI agent to make sure it follows the instructions you just gave it.
Adjust the persona as many times as necessary to achieve the perfect fit. I suggest investing time in this now, as it will save you from having to make frequent adjustments later.
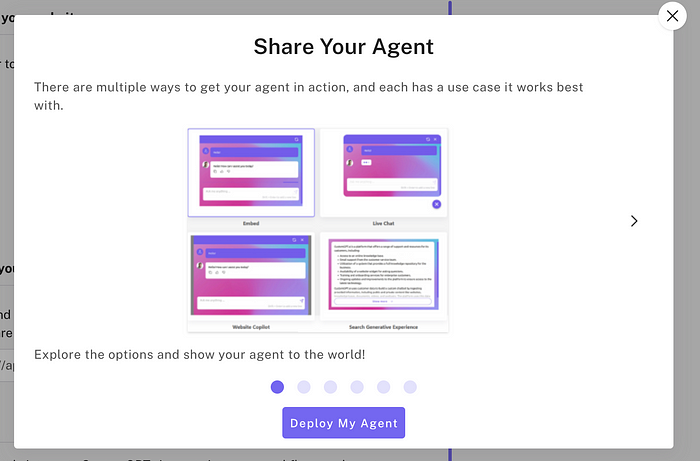
7. Deploy
Now your AI support bot is ready for launch. To start using it, click on “Deploy My Agent.”
8. Publish
If you want anyone to be able to interact with your AI agent, activate the “Public agent” slider on the top right corner.
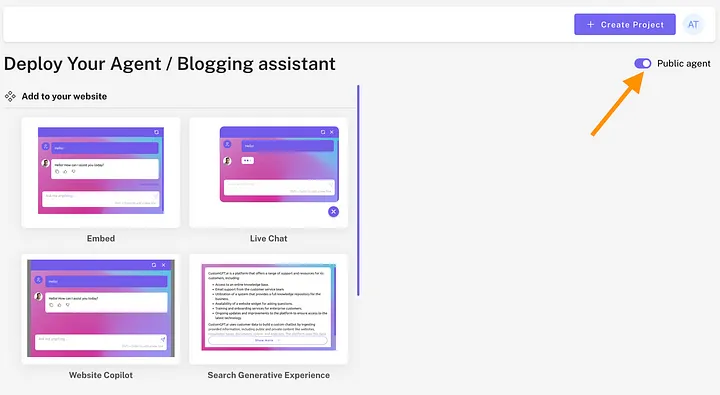
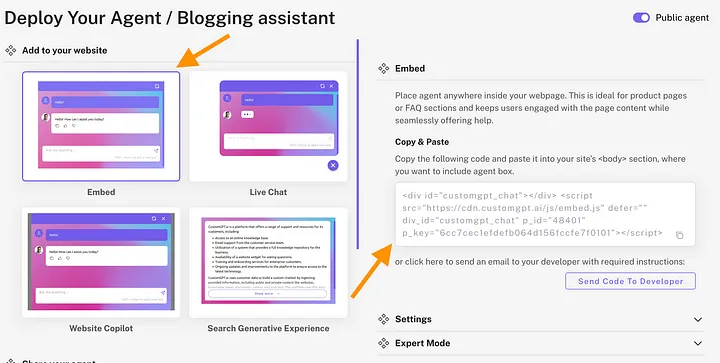
9. Pick a widget
Then choose the chatbot style. You can, for example, add a live chat to your website or embed a chat window on a specific page.
10. Example: WordPress agent
Let me show you how to embed your CustomGPT agent into a WordPress site (the most common website builder).
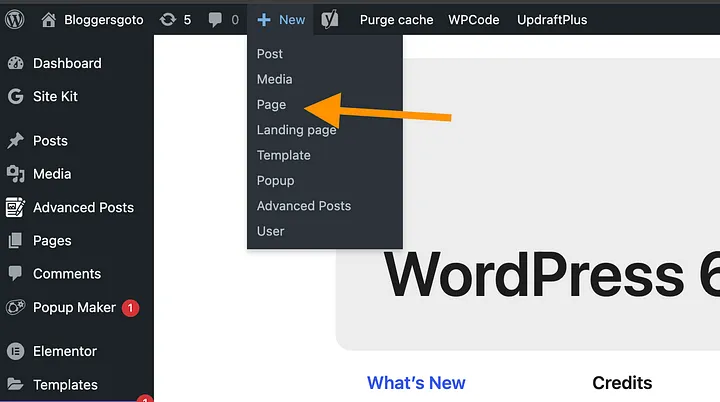
First, sign in to your admin view.
Then click on New > Page:
Then give your page a title.
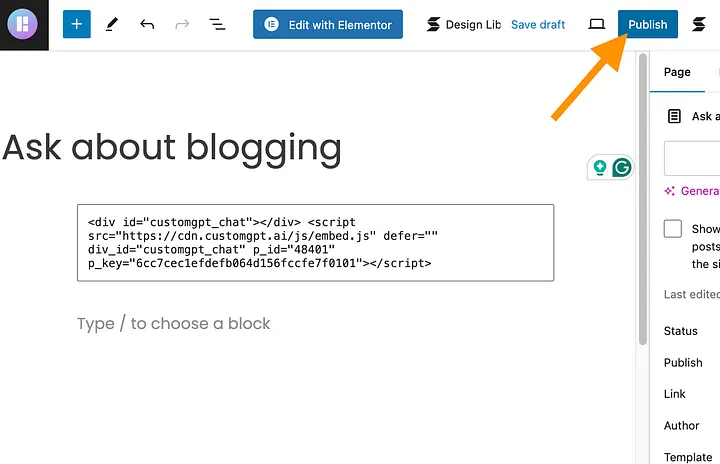
After that, click on the plus icon and type “HTML” in the search box. Then click on the “Custom HTML” block that appears below.

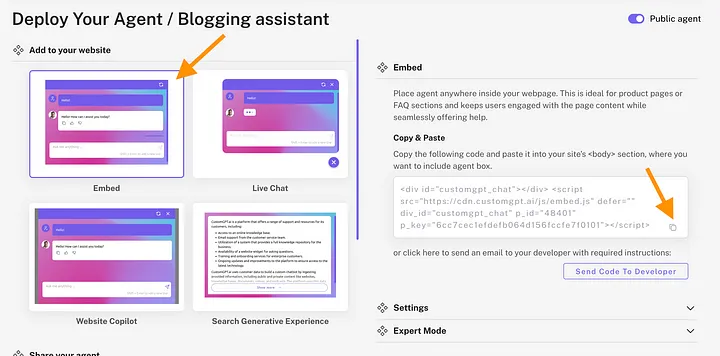
Go back to your CustomGPT agent deployment view and choose “Embed” as the chatbot style. Then copy the code on the right to your clipboard.
Then paste the code to the HTML block on your WordPress site:

Then click on the laptop icon and click Preview in the new tab:
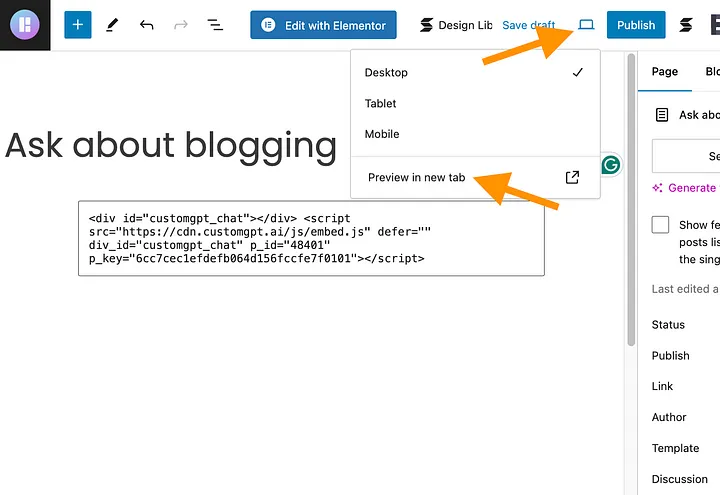
Now, your page should show your AI agent that you can interact with.
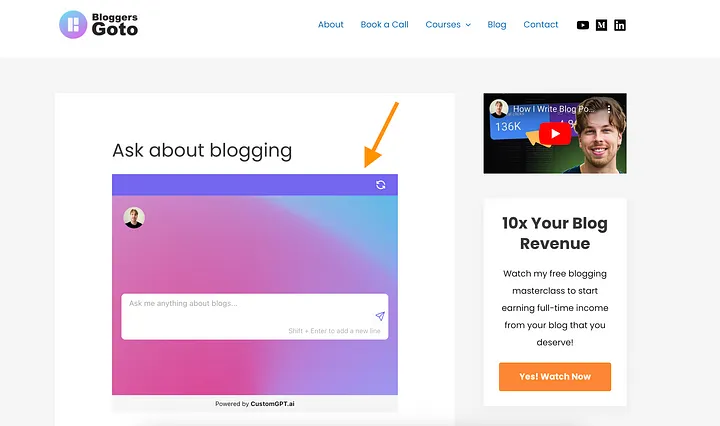
If you’re fine with everything, then publish the page.
That’s how easy it is.
11. Share a link
Remember that you can also share a CustomGPT bot directly via a link that you get in the Agent’s dashboard:
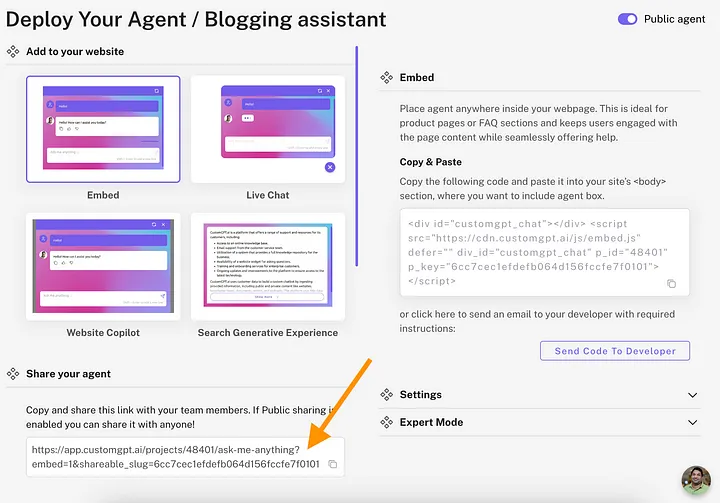
As long as your agent is public, anyone can use it with this link.
12. Wait
Don’t forget that it can take a while for CustomGPT to learn all the information you share with it. This depends on the size of your data source.
If the bot is not ready for use yet, you will see a view like this:
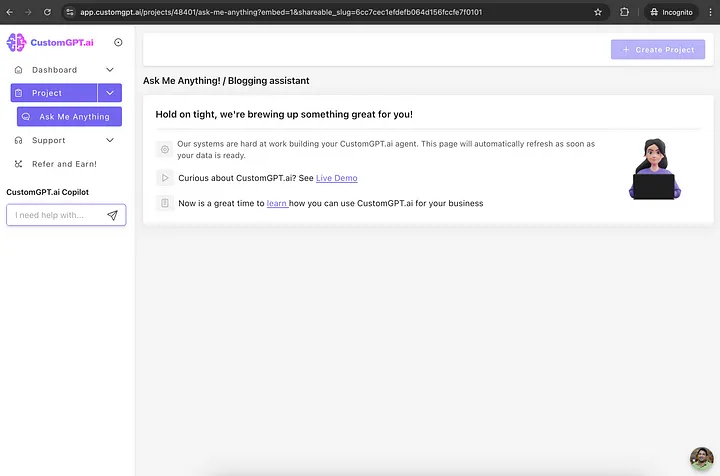
If this happens, just wait. For my 150-page website, this took about 30 minutes.
Conclusion
CustomGPT is pretty cool, you can create you own AI chatbot. And whether you are a business man wishing to enhance customer care, or a developer curious as to what you can do with AI, CustomGPT provides the freedom, and the tools, to make something special.
Ready to build your own chatbot? Visit CustomGPT to get started, and don’t forget to take advantage of any available trials or discounts.
FAQs
1. What is the best pricing plan for beginners? The Basic Plan is ideal for beginners as it provides access to the essential features needed to build a chatbot.
2. Can I integrate CustomGPT with my existing CRM system? Yes, CustomGPT supports integration with a variety of third-party tools, including CRM systems.
3. Is there a free trial available? CustomGPT often offers free trials or discounts. Check their website for the latest offers.
4. How much technical knowledge do I need to use CustomGPT? CustomGPT is designed to be user-friendly, with most features accessible to those without advanced technical skills.
5. Can I use CustomGPT for non-English languages? Yes, CustomGPT supports multi-language models, making it suitable for businesses operating in multiple regions.